How A Master Knife Sharpener Saves Broken Knives
Released on 08/22/2023
[upbeat music] Nice and sharp.
Today we're gonna be going over everything you need to know
about repairing your knives at home.
Tools I use for sharpening
and repairing knives are whetstones.
With the whetstones you can match the angle of your knife.
Before you use your stones, you need to prep them.
All you need to properly use them is tap water, right here.
The stones I'm soaking are the rough stones
and the medium stones.
And when you soak it in water at first
you'll see like, air bubbles start to form
and you wanna basically wait
till all the air bubbles have settled down.
That's when you know your stone is fully saturated
and ready for you to use for sharpening.
As you can see, I didn't soak the finishing stone
because those are a little bit more delicate
and if I soak it in water for too long
it can actually crack,
and I've cracked a few
'cause I've left it in water overnight.
Come in the next day [laughs] and I see two pieces.
Before we actually sharpen it,
I want to make sure that I don't miss any chips
so I like to take the piece of paper
and cut through from heel, all the way to the tip.
[paper rasps] And every time it catches
I know that's exactly where a chip in the knife is.
So I wanna make sure that I see and inspect
and make sure I'm aware of where all the chips are
so I don't miss anything when I grind it out.
The paper test shows that this has microscopic chips.
Obviously, there's some that's very noticeable
but there's a lot of little ones all along the edge.
So I wanna make sure I don't miss any of that
when I grind on the rougher stone.
A lot of times people try to sharpen the knife
and fix the knife in one shot.
But I always say it's best to think of it
as two separate processes.
So the first thing we're gonna focus on
is just grinding out the chips.
For that I'm gonna use the rougher stone I have.
This is the 220 grit rough stone.
I have here just the stone base.
This is just gonna secure the stone
and give a little bit more grip.
It also adds a little bit of height
from the table so it makes sure that my knuckle
clears the table when I'm sharpening.
This is not required to sharpen your knife
but I just like to have a little extra height.
The goal right now is to just grind metal
这所有的芯片都消失了。
So the first side I'm gonna do
is just work on my left side, facing down.
When I do this, my thumb is on the spine,
my index finger is on the heel.
Three fingers around the handle
for a nice firm grip.
I want to have full control of the knife
when I'm doing this.
This right here, is a double beveled knife,
which means that I have to sharpen
[knife scrapes] and grind both sides.
This particular knife is sharpened symmetrically
so I wanna make sure that I grind
the same amount on both sides
to keep everything even.
I'm just gonna use a very steep angle.
I like to hold a knife around four o'clock or five o'clock
in terms of position so I'm not wobbling around.
'Cause if I wobble around
the angle's constantly changing,
that really affects the outcome of the edge.
My right hand is really focusing
on the angle of the knife
and moving the knife up and down.
My left hand is really applying all the pressure.
When I flip over, I'm gonna change my grip a little bit.
My thumb is gonna be on the heel,
my index finger on the spine.
And just like before, I hold the knife
at a four o'clock or a five o'clock position.
I'm applying a good amount of pressure
with my left hand.
I'm pressing firmly, but I'm not pressing
with all my might because that could be dangerous.
If I slip, I can really hurt myself.
I actually prefer sharpening, standing,
'cause I can use my body weight
and that's gonna make it easier to grind faster,
apply a good amount of pressure.
So every now and then I'm gonna wipe the knife
and check to see my progress.
And you can see already
that the chips are starting to come out.
There's only a few more pieces left.
[knife scrapes]
So you see me constantly wiping my blade
'cause a lot of times,
if you have a high carbon steel knife,
it can actually rust as you're sharpening.
If you leave the knife on the table
with a few drops of water,
you'll see a little particles of rust.
If you cut anything acidic
you can actually see discoloration almost immediately.
So with high carbon steel,
the key is constantly wiping your blade
even as you're sharpening, even as you're using it.
This particular one is stainless
so I don't have to worry about it.
But since I'm so used to it,
I just like to constantly wipe my knife.
So as I'm sharpening on the stone,
the stone is actually wearing down.
And to make sure that I have this flat even, surface,
even as I'm sharpening,
I like to periodically stop and use a stone fixer.
If your stone looks like a half pipe,
it's gonna be very hard to repair.
So to avoid that, I always say,
try to use this as frequently as you can.
So I worked on the stone a little bit with the fixer,
I can just continue grinding my knife.
[knife scrapes]
And I think we're good to go.
Now that I've grinded all the chips out,
this knife is just a little bit smaller,
but for usage, for function,
it's not gonna make a difference and it's barely noticeable.
We can move on to the sharpening
and creating an edge on this knife.
For that, I'm gonna use the same stone,
this is the rough stone that I've been using.
So I like to take two pennies,
stack them up and place them on the stone.
And what I do is I lay the spine of the knife
onto these pennies,
and that's gonna give you a rough guideline
on what the angle should be.
By working on the two pennies on the backside
I'm creating a plane on that side.
I'm gonna do the same amount on the other side,
and those two planes intersecting
will create a perfect edge.
I'm gonna place my two fingers right on that very tip
and I'm gonna press firmly as I pull straight down.
When I go back up, I'm actually not applying pressure.
I'm gonna release pressure as I go back up,
apply pressure as I pull, coming back towards me.
And when I go back up, I move my fingers slightly over.
And I continue to work my way down the knife in sections.
[knife scrapes]
If I apply pressure towards the edge,
my knife can actually cut into the stone.
I'm gonna flip over,
and do the same thing for the other side.
However, this time the edge is facing me.
I start at the bottom of the stone,
place two fingers right on the tip,
and I apply pressure as I push away.
Come back down,
push away.
The angle that I'm using,
I'm making sure it's the same angle
as I did on the other side.
So two pennies under the spine
is gonna give me the proper angle.
So as you sharpen these two planes
and they start to intersect,
what's gonna happen is the very edge
is gonna start to curl over
and it's gonna create what's called a burr.
This burr or little ridge
is something that you can feel
just by touching the flat part of your knife
and running your fingers off.
And you wanna feel that burr or ridge catch on your finger.
If you don't feel that
your knife is just not sharp yet.
Depending on how dull your knife is,
this process can take five minutes,
this process can take half an hour.
So you just have to be patient
and keep feeling and keep checking for that burr.
Once I've gotten the burr to form on both sides
I'm ready to move on to my second stone,
which is gonna be the medium stone.
With the medium stone,
what I'm gonna do is actually repeat
相同的过程,会开始改善the edge.
You're gonna start to see this sediment buildup.
There's this almost like mud.
You wanna make sure you see that
'cause that sediment is basically
a mixture of the stone and the metal
that's being taken off of your knife.
This sediment's actually helping you
sharpen more efficiently
so you don't wanna wash all that off.
If your stone starts to feel dry
you can splash some water on it.
I'm gonna be constantly checking
for the burr or form evenly
from the tip, all the way to the heel.
And once I get it on one side
I wanna make sure that I get it on the other side as well.
A final step is to use this finishing stone,
and this is gonna really refine the edge
and get your knife nice and sharp.
Just a reminder, this one was the dry stone.
So the way we use a finishing stone
is by splashing water on it
before you go ahead and sharpen.
I'm gonna also use this little dressing stone,
or in Japanese, it's called a nagura stone.
I'm pre-creating a little bit of grit
so that it's gonna really help
with the polish on the knife.
At this point, your knife is fairly sharp,
we've already worked through two stones.
And when you have a sharp edge on your knife,
一把锋利的边缘so delicate
so you have to be a little careful.
A finishing stone like this is actually
[knife taps] very hard.
And if you take this sharp edge,
press it really hard against this finishing stone,
you can actually crush the edge that you just created.
The key to using a finishing stone
is to press a lot lighter
than the previous two stones.
I'm using the weight of the knife
and the weight of my hand to work on the knife.
I'm not pressing any harder than that,
but other than that, all the same techniques apply.
And even though I'm pressing very lightly
you can see the sediment's increasing.
There's much more, now that I started sharpening.
Because the stone is so fine
you're not gonna be able to feel for any burrs.
So what I like to do is take the knife,
pinch the edge of the blade, and run my fingers off.
And I wanna make sure when I do this,
I don't feel anything catch.
If I feel something catch
that means there's still a burr remaining,
so I'm gonna work just a little longer
until the edge has nothing on it.
The other thing I'm looking for
is for the edge to get really nice and shiny.
It's gonna look almost like a mirror finish
if you shine it in the light.
I usually work on a finishing stone
for five minutes, maybe 10 minutes if I have time.
But the longer you work
and get that edge nice and polished,
the smoother your edge will be.
We should be good to go with this knife.
You saw all the chips catching on the piece of paper
so I'm gonna make sure that I didn't miss anything.
So heel to tip all the way down, it's much cleaner cut.
In the beginning, this knife was really badly chipped.
It wasn't very sharp.
I used three stones,
the rough stone to grind out the chips
and set the new bevel.
The medium stone to refine
and the finishing stone to really polish the edge up.
If you were to fix this at home,
this process, from top to bottom,
should have taken around 15 to 20 minutes.
And now this knife is ready for you to use
in your kitchen and cook delicious food.
Lastly, I wanna show you guys my personal knife right here.
I've had this for 13 years,
and this knife has gone with me
to many Michelin restaurants and culinary schools.
And this knife used to be a 9.4 inch chef knife.
As you can see, this is now,
about a six inch utility knife
but it still gets it very sharp.
And the reason why I wanna show this to you
is because if you take care of your knives,
these knives can last you many, many years.
So if you feel that you're not able to fix
your own knife, that it's too far gone,
you can always send it to me at Korin,
and I'll be more than happy to fix your knives for you.
-

How to Make Polish Pierogies, Part 2
-
How to Make Chinese Moo-Shu Pork, Part 2
-

How to Make Espresso
-
How to Make Filipino Lumpia, Part 2
-
How to Make Nigerian Akara, Part 3
-
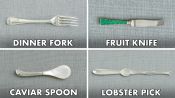
How To Use Every Utensil
-
How to Make Italian Pasta Bolognese, Part 1
-
How to Make Chinese Moo-Shu Pork, Part 1
-

Reinvent Your Leftover Chicken
-
How to Make Italian Pasta e Fagioli